Integration: Has Offers
Adverse can integrate with affiliate tracking platforms like Has Offers. In this guide we'll show you how to connect the two platforms and make sure that all tracking works properly.
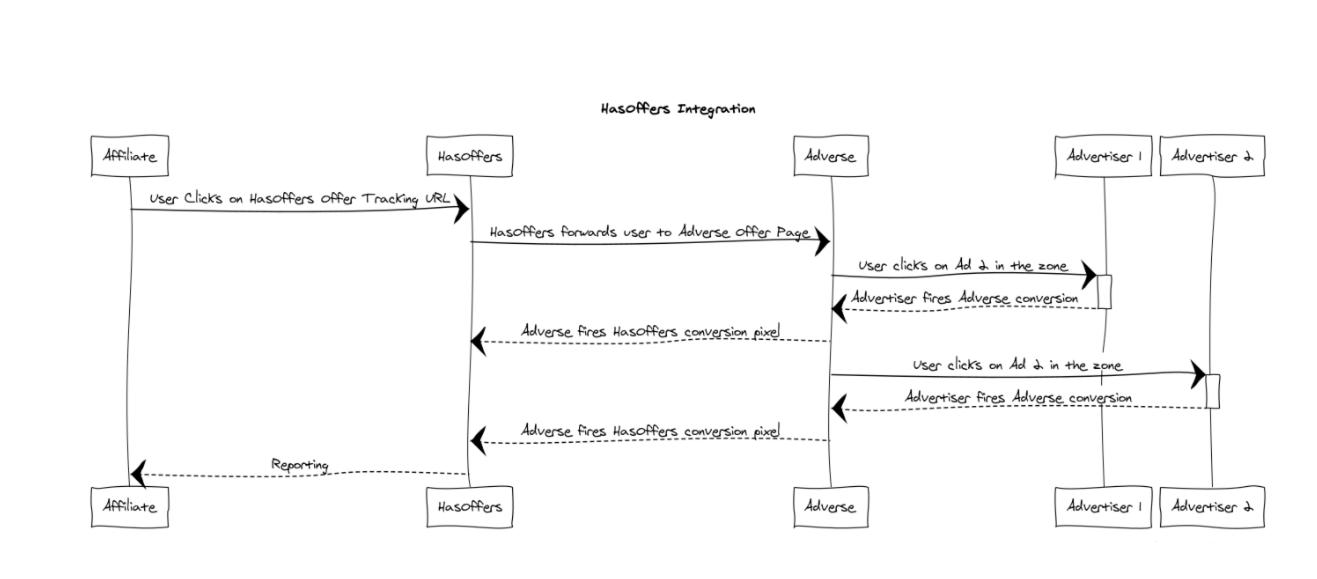
At a high level, here's a diagram of the user's path (solid lines) and reporting pixels (dashed lines):
Before we continue, please make sure that you have a complete Network. Follow the Network Setup Guide if you'd like an example.
HasOffers Setup
From the perspective of HasOffers, Adverse will be a single offer. HasOffers will not know about the individual Advertisers and Ads within Adverse. All revenue from Adverse will rolled up into a single offer.
Adverse does not require any special set up for Affiliates within HasOffers. For the purpose of this guide, we'll assume that Affiliate accounts are already created and set up properly.
Create an Advertiser in HasOffers
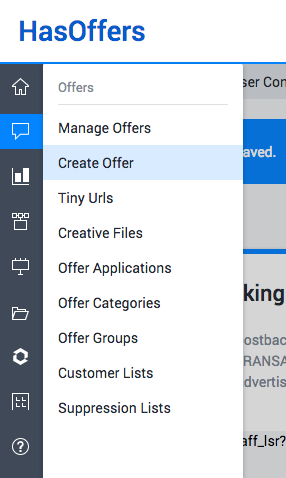
To send traffic from an Affiliate to an Adverse Site, we first need to create an Offer within HasOffers. We can do this by selecting "Create Offer" from the navigation menu:
On the "Create Offer" page, be sure to fill in the following fields:
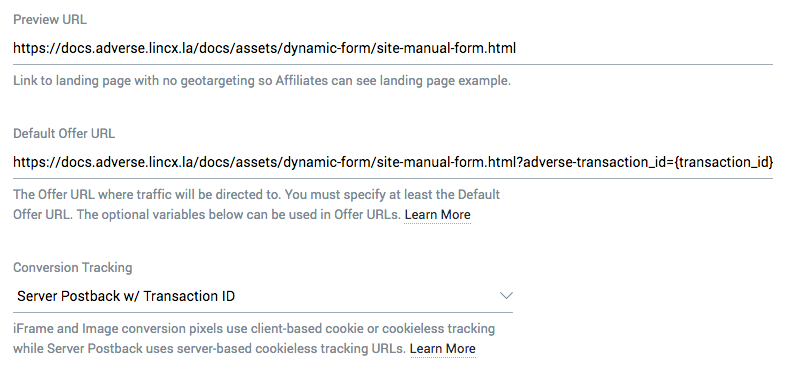
Name: This should match the Adverse Site or Zone that we are sending traffic to. In our case we use the name "Adverse Shoes" to match the Site in our example Network.Preview URL: This will be the URL of the page with our Adverse Zone. In our case it ishttps://docs.adverse.lincx.la/docs/assets/dynamic-form/site-manual-form.html.Default Offer URL: This is the same asPreview URLexcept for one important change: we must add the HasOffers Transaction ID as a query parameter.{transaction_id}is a HasOffers macro -- whenever the tracking URL is used, it will automatically be replaced with the HasOffers Transaction ID. To allow Adverse to store the HasOffers Transaction ID for cookieless server-based tracking we will add?adverse-transaction_id={transaction_id}to the end of our URL. By using a query parameter label that begins withadverse-it will automatically be ingested by Adverse.transaction_idwill be available as a macro in both Adverse Creative Target URLs and Postback Pixels and it will contain the value provided by the HasOffers macro. When we append the query parameter to the end of our URL we get:https://docs.adverse.lincx.la/docs/assets/dynamic-form/site-manual-form.html?adverse-transaction_id={transaction_id}Conversion Tracking: We set this toServer Postback w/ Transaction IDStatus: This must be set toActivebefore Affiliates can see this Offer.
Here's what these fields look like when filled in:
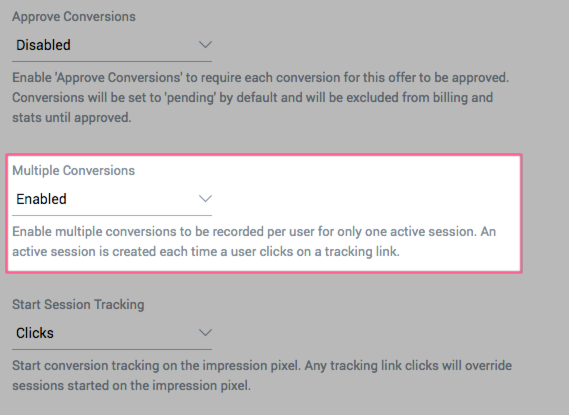
Next, we need to allow multiple conversions. This is important so that more than one Adverse Ad can attribute revenue to a visitor. To enable multiple conversions, scroll down to the bottom and expand the "Tracking" section:
![]()
Find the setting for "Multiple Conversions" and ensure that it is set to "Enabled."
Once this is complete, we click "Add Offer."
Store Conversion Tracking URL
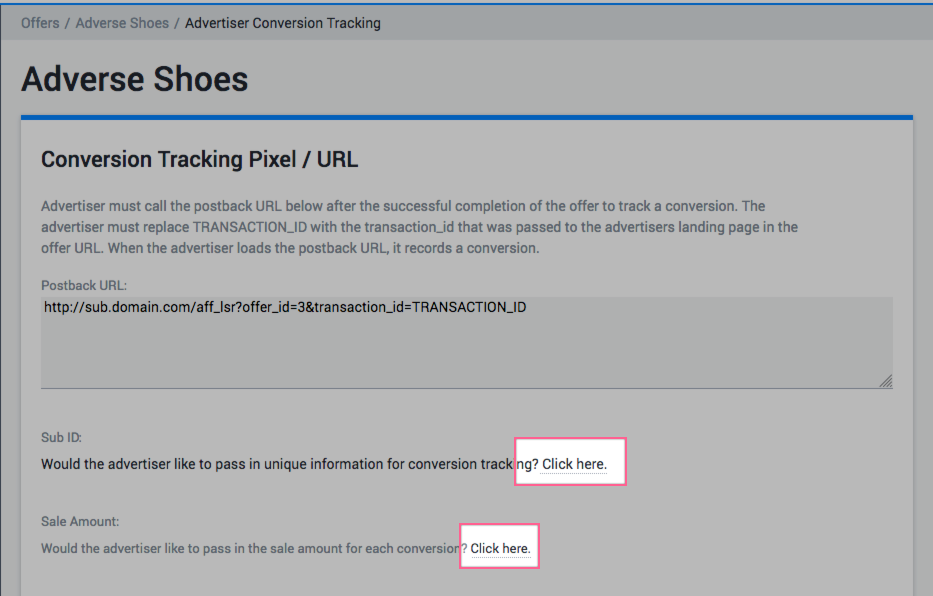
After we click "Add Offer," we see a page with Conversion Tracking information. We need to enable two settings before we store this URL. We do this by clicking on "Click here" in the "Sub ID" and "Sale Amount" sections:
After we enable both of those tracking features, our Conversion Tracking URL should change to include the relevant parameters:
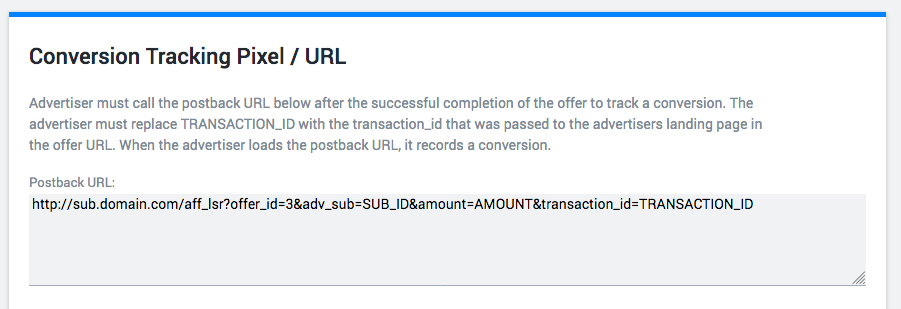
Now that we have this URL, we will be able to set it as a postback pixel for an Adverse Zone. We'll get to that in a bit, but now is a good time to tweak the URL to include Adverse macros:
http://sub.domain.com/aff_lsr?offer_id=3&adv_sub=SUB_ID&amount=AMOUNT&transaction_id=TRANSACTION_ID
Will become:
http://sub.domain.com/aff_lsr?offer_id=3&adv_sub={{adverseClickId}}&amount={{price}}&transaction_id={{transaction_id}}
Your tracking domain, path, and offer will be different, but be sure that adv_sub is set to {{adverseClickId}}, amount is set to {{price}}, and transaction_id is set to {{transaction_id}}.
We're just going to hold onto this URL for now, but we'll need it soon on the Adverse side.
Generate Affiliate Tracking Links
Before switching back over to the Adverse, we'll want to generate tracking links for our Affiliates.
Using the navigation menu click on "Manage Offers":
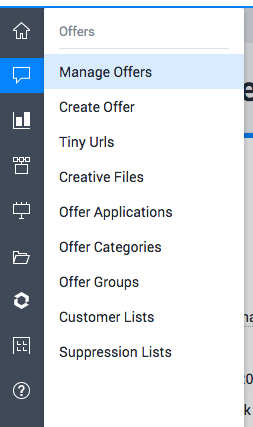
Select the Offer that we just created and scroll down to the "Generate Tracking" section.
Choose the Affiliate you would like to create a Tracking Link for and on will appear:
![]()
Navigate to that link to verify that you are taken to the correct Adverse offer page and that the full HasOffers Transaction ID appears in the URL in the query parameter adverse-transaction_id.
Adverse Setup
At this point we've created Tracking Links for each of our HasOffers Affiliates and we've verified that they lead to the correct page with an Adverse Zone. Our last step is to add the HasOffers Conversion URL as a postback pixel on our Adverse Zone.
Zone Postback Pixels
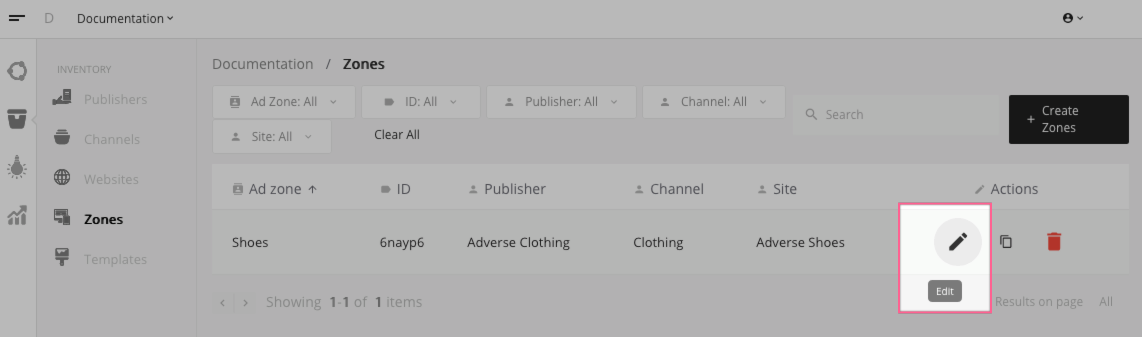
To do this, navigate to the Zones list in Adverse:
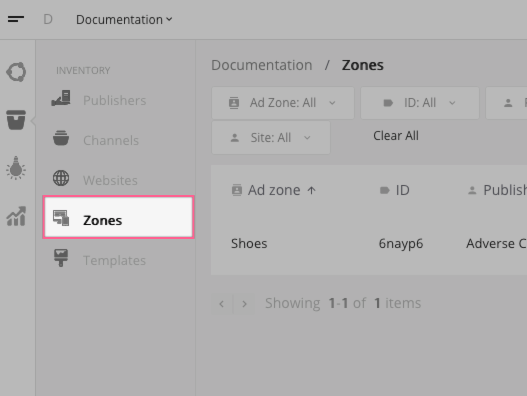
And select "Edit" from the action menu:
Then add our edited HasOffers conversion URL to the postback pixels. Here's the edited URL from above:
http://sub.domain.com/aff_lsr?offer_id=3&adv_sub={{adverseClickId}}&amount={{price}}&transaction_id={{transaction_id}}
This is the same as what was displayed in HasOffers, but the difference is that we replace the values with the appropriate Adverse macros:
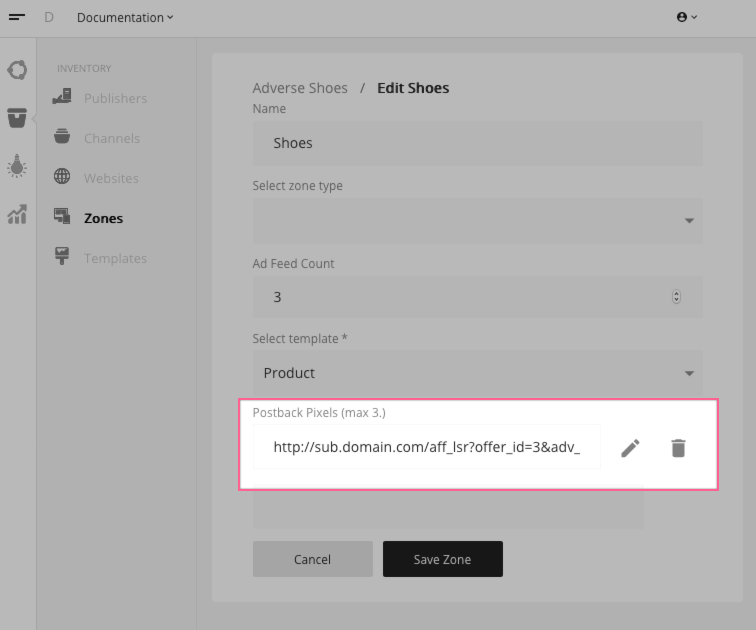
At this point any conversion will propagate through to HasOffers, and Affiliates will see proper reporting.